7 essential tools for making specialty coffee at home
Ever spent good money on a bag of specialty coffee and still ended up with a cup that tasted flat, bitter, or sour? The beans are rarely the problem. Your setup, meaning the gear you brew with, usually is.
Here are the 7 essential pieces of equipment for great coffee at home, in the order they actually matter. Think of it as a chat over the kitchen counter.
1. A burr grinder: the most important tool you’ll buy
If you only take one piece of advice from me, make it this: spend on the grinder first. Put 40% to 60% of your starting budget into it.
A good grinder uses burrs, which are two steel discs or cones that cut the beans evenly, like a sharp pair of scissors. Blade grinders just chop beans at random and leave you with fines (ultra-fine dust that turns bitter) and big chunks (that taste sour). That’s a lopsided cup.
Modern hand grinders can handle 20g of coffee in under a minute, and they’re the best bang for your buck. If you prefer electric, the Baratza Encore, Baratza Encore ESP, and Fellow Opus are solid picks. All-rounders like the DF54 or Mahlkönig X54 shift smoothly between pour-over and espresso.
2. A digital scale with a timer
Scooping coffee with a spoon or eyeballing it means a different flavor every morning. A scale lets you repeat the recipe that worked.
A basic scale accurate to 0.1g does the job. If you want to splurge later, look at the Timemore Black Mirror Basic 3 or the DiFluid Microbalance, which uses Bluetooth to graph your extraction live.
The go-to starting point is a 1:15 brew ratio: 1g of coffee for every 15g (or ml) of water. In real life, that’s 20g of coffee to 300ml of water.
3. A gooseneck kettle
The long, curved spout gives you control over how fast and where the water lands. That helps you avoid channeling, which is when water carves a shortcut through the coffee, rushes past, and leaves the rest under-extracted.
An electric kettle with temperature control, like the Fellow Stagg or Bonavita, makes life easier. No thermometer? Bring water to a boil, turn it off, and wait about 2 minutes.
Hot water doesn’t “burn” coffee. It does extract more, though, and with dark roasts that can pull out unwanted bitterness.
4. A brewer: start with filter coffee
Here’s the biggest beginner mistake: buying an espresso machine first. Espresso is unforgiving, the gear is expensive, and one small slip in grind or tamping gives you a drink you can’t finish. Start with filter coffee.
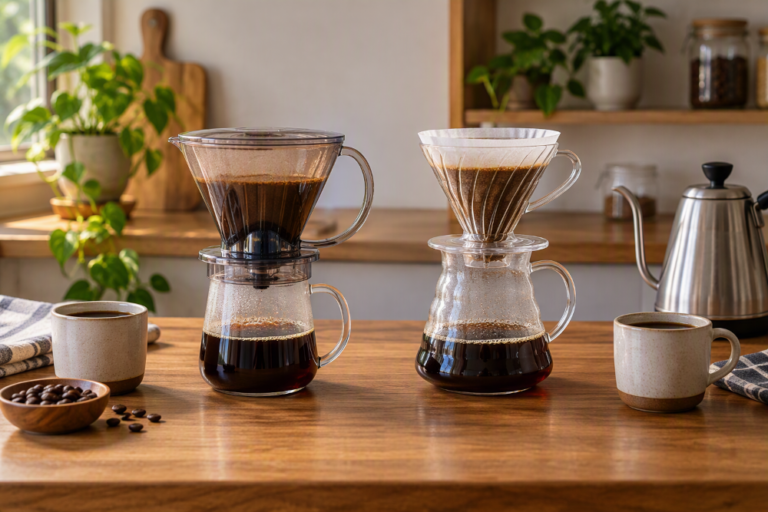
There are two basic ways to extract. In percolation, water passes through the grounds and filter by gravity (V60, Kalita Wave). In immersion, the grounds sit soaking in water before you separate them (French press, Clever Dripper, Hario Switch). Pick one of each to start.
- AeroPress, Chemex, and Hario Switch: versatile, forgiving, and hugely popular with beginners in the US.
- Hario V60: a cone that highlights clarity and brightness.
- Kalita Wave and Timemore B75: flat-bottom brewers that tolerate small mistakes better.
- French press: no paper filter, and it works great with a medium grind.
5. Quality paper filters
The paper controls how fast water drains and how much oil and sediment reach your cup. Hario V60, Cafec, and Sibarist filters are good places to start.
One habit changes everything: rinse your filter. Pour hot water over the filter in the brewer, then dump that water out. Skip it, especially with unbleached papers, and your coffee can taste like cardboard.
6. A serving carafe
It sounds fancy, but it helps. Swirling the carafe evens out the brew (coffee comes out stronger at the start and weaker at the end), and you can pour small servings.
Sipping as it cools gradually makes the flavors easier to pick up. Borosilicate glass carafes from Hario or Kalita work well.
7. Better water
Water makes up about 98% of your cup. Tap water often carries chlorine and an imbalance of minerals that throw off flavor.
Use a well-maintained filter, or go for distilled or reverse-osmosis water with mineral packets such as Third Wave Water. If you want to nerd out, look into TDS (total dissolved solids, a measure of how much coffee ended up in your cup, read with a refractometer).
Quick tips: how to test your setup
- Rinse the filter and discard the water.
- Weigh 20g of coffee, ground right before brewing (whole beans protect against oxidation).
- Do the bloom: a gentle, circular first pour, 2 to 3 times the weight of the grounds, to release trapped carbon dioxide and wet everything evenly.
- Pour up to 300ml, with a bit more turbulence on later pours.
- If it runs past 5 minutes and tastes bitter, grind coarser.
Start with light to medium roasts with chocolate, caramel, and nut flavors. Very dark roasts often use bitterness to cover up flaws in the beans.
Frequently Asked Questions (FAQ)
Do I need to buy everything at once?
Nope. Start with a burr grinder, a basic scale, and one brewer. Add the rest as you go.
Is pre-ground coffee okay?
It works, but you lose a lot. Fresh-ground coffee keeps its aroma, and each brewing method needs its own grind size.
When should I buy an espresso machine?
Once you’ve got filter coffee down and a solid grinder. Machines like the Breville Bambino Plus or a Flair Neoflex lever are great next steps.
Keep exploring